Water Leaking From Geyser? Get Quick Solutions With Checklist
Facing geyser water leakage? Learn the real causes, easy fixes, safety tips, and when to call a technician. Simple guide to stop leaks and protect your home.

You notice water pooling beneath your geyser and your heart sinks. Is it a minor drip or something serious? Here’s the truth: not every leak means your water heater is finished. But ignoring it? That’s risky. Unchecked leaks invite electrical hazards, mold growth, wasted water, and sky-high bills. In worst cases, pressure builds up and tanks crack.
The good news is most leaks have simple fixes. In this guide, we’ll walk you through why your geyser leaks, how to spot where it’s coming from, which problems you can handle yourself, and when it’s time to call the professionals at Concord Services. Let’s get started.
Step By Step Process To Fix Geyser Leakage
Why Do Geysers Leak? Quick Overview of Common Causes
Your geyser doesn’t just wake up one day and decide to leak. There’s always a reason. Understanding what causes leaks helps you catch problems early and avoid costly damage.
Thermal Expansion and Pressure Buildup
When water heats up, it expands. If your geyser doesn’t have proper pressure relief, this expansion creates internal stress that forces water out through weak points.
Age and Internal Corrosion
Over time, the inner tank corrodes, especially in hard-water areas. The sacrificial anode rod protects the tank, but once it’s worn out (typically 5+ years), rust takes over and creates tiny cracks.
Faulty or Worn Valves
The Multi-Function Valve (MFV) and Non-Return Valve (NRV) are your geyser’s safety guards. When they fail, excess pressure has nowhere to go but out through your pipes and joints.
Loose Fittings and Damaged Washers
Heat cycles make connections expand and contract. Over time, rubber gaskets harden and crack. Loose nuts at inlet and outlet connections are one of the easiest leaks to fix.
High Inlet Pressure
Most geysers are rated for 80 PSI maximum. Excess pressure from your water supply stresses all components and causes premature leaks.
Hard Water and Sediment
Mineral deposits build up around valves and heating elements, blocking proper function and trapping pressure inside.
Not Confident To Repair Your Geyser?
Contact Us For Same Day Doorstep Repair
₹0 Advance Charges
How to Identify Where the Leak Is Coming From
Knowing where water is escaping tells you everything. Let’s break down the common leak locations so you can diagnose like a pro.
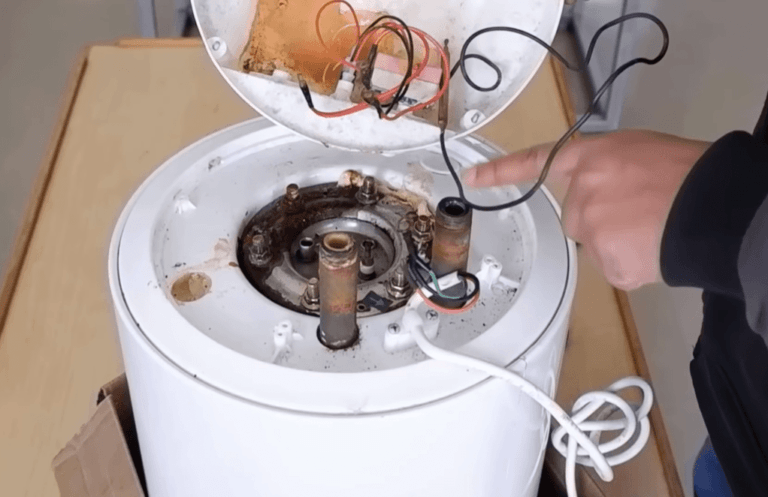
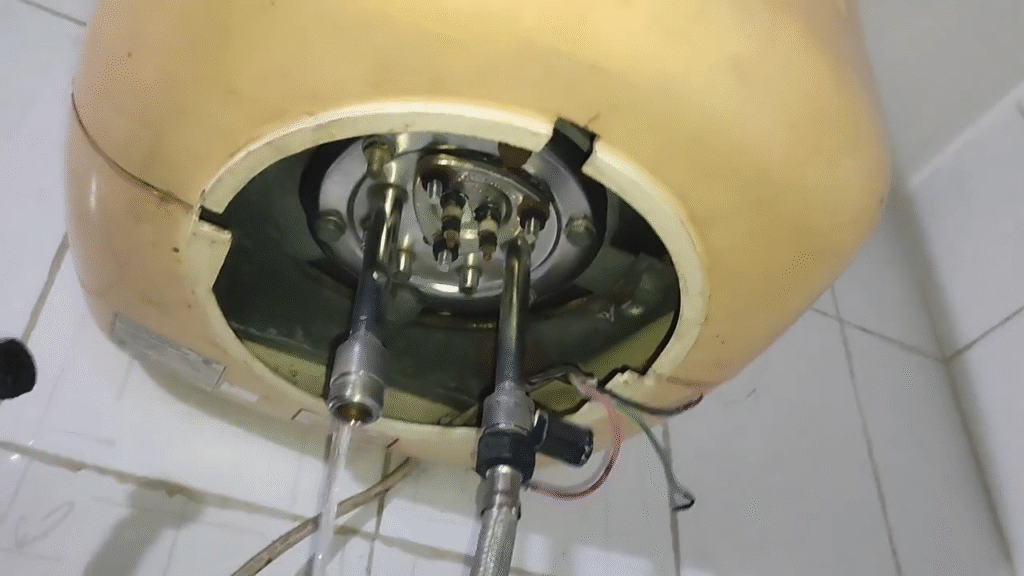
Leakage from the Bottom of the Geyser
Water pooling at the base is serious. It usually points to a worn gasket at the heating element flange or internal tank corrosion. The inner tank may be cracked (often irreversible and means replacement time). Faulty MFV valves also drip continuously from the bottom. The good news: gasket replacement is simpler than tank replacement. Check if tightening the flange bolts stops the leak first.
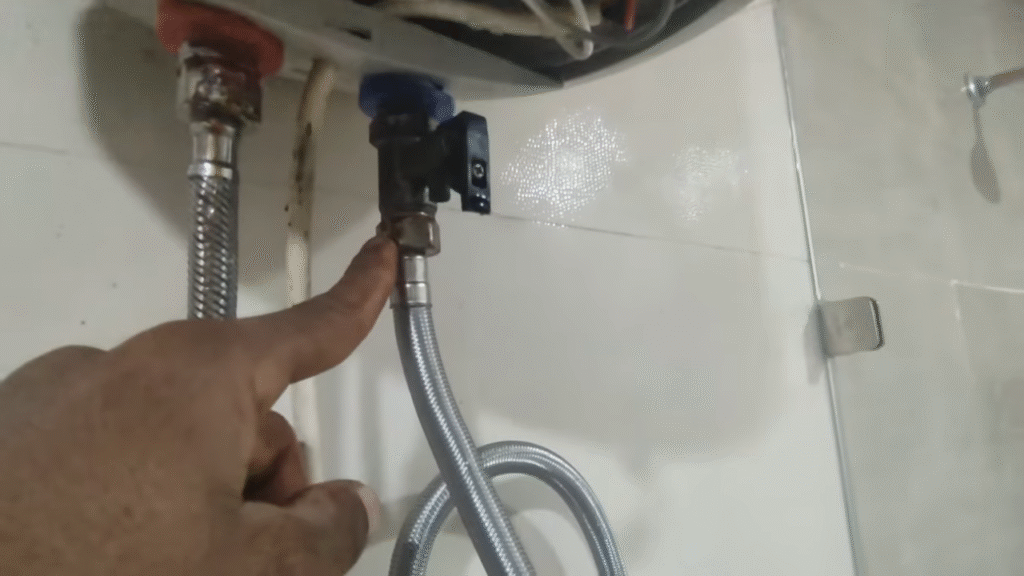
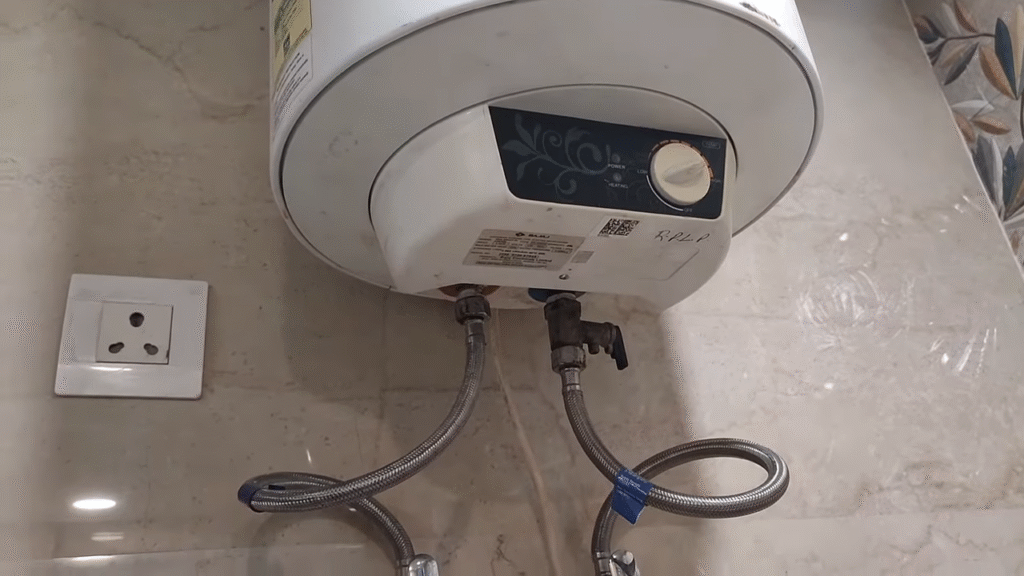
Leakage from the Inlet or Outlet Pipe Joints
This is the most fixable leak. Loose fittings and hardened washers are the usual suspects. Water connection points expand and contract with heat cycles, loosening over time. Grab a wrench and tighten the joints gently. If that doesn’t work, drain the geyser, replace the washer, and reseal with Teflon tape. Damaged hoses need replacement to prevent further issues.
Water Dripping from the MFV (Multi-Function Valve)
Here’s something that confuses most homeowners: MFV dripping during heating is often normal. When water heats, it expands and needs somewhere to go. The MFV releases this pressure safely. However, continuous dripping even when not heating signals a blocked or faulty valve. Never remove or block this valve—it’s your safety guardian. Clean salt deposits by lifting the drain lever, or call a technician if it persists.
Leakage from the Temperature & Pressure (T&P) Valve
This is a red flag. The T&P valve only releases water when temperature or pressure exceeds dangerous limits. If it’s leaking, your geyser is overheating or building dangerous pressure inside. Turn off power and water immediately. This requires professional inspection—don’t ignore it.
Leakage Only When Geyser is Heating
Water only appears during heating? Thermal expansion is the likely cause. As water heats, it pushes outward. In high-rise buildings with pressure-reducing valves (PRVs), this trapped expansion has nowhere to go except through the MFV drain. This is completely normal and protective. Install a drain pipe from the MFV to direct water away from your bathroom floor.
Internal Condensation vs Actual Leakage
Before you panic, check if it’s really a leak. During winters or in humid bathrooms, condensation forms on the outer surface like sweat on a cold glass. Wipe the area completely dry. If moisture doesn’t reappear after 30 minutes of no heating, it’s condensation, not a leak. True leaks flow continuously regardless of conditions.
Can’t figure it out on your own? No worries. Concord Services is here to help. We’re one of Kolkata’s most trusted geyser repair specialists, serving you and your neighbors with fast, reliable fixes.
Top Geyser Water Leakage Problems & Their Solutions
Loose or Worn-Out Pipe Connections
What’s happening: Heat cycles expand and contract metal pipes. Over time, connections loosen. Corrosion weakens fittings further, especially in older installations.
Your fix:
- Tighten inlet and outlet couplings gently with a wrench (don’t force—you’ll damage threads)
- Replace corroded or kinked pipes with new flexible hoses rated for hot water
- Wrap Teflon tape around all threaded connections before tightening (this prevents leaks and is standard practice across AO Smith and Symphony models)
- Check connections every few months since vibration can loosen them again
Pro tip: If tightening doesn’t stop the leak, the washer inside needs replacement. Drain the geyser first, then swap it out.
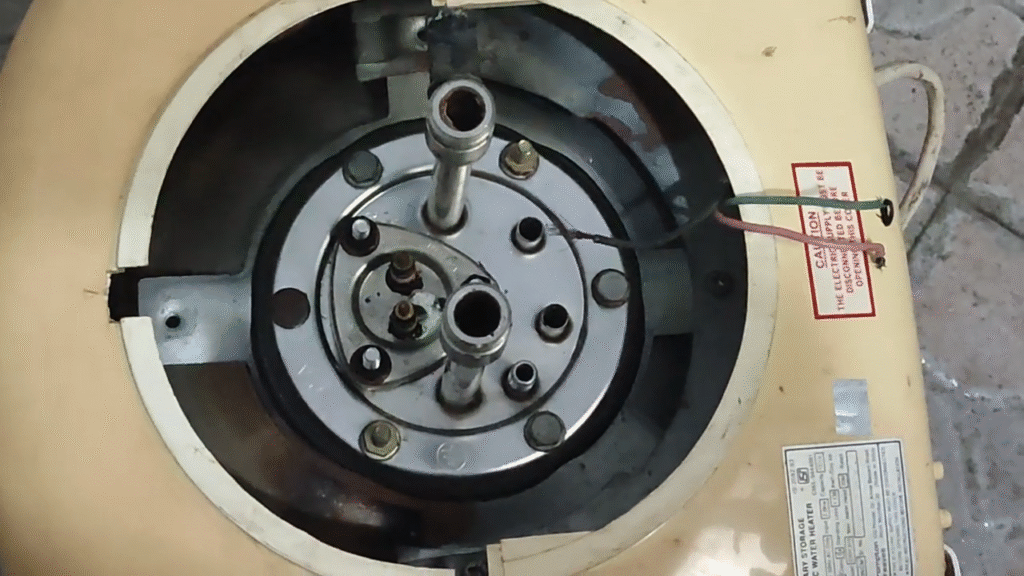
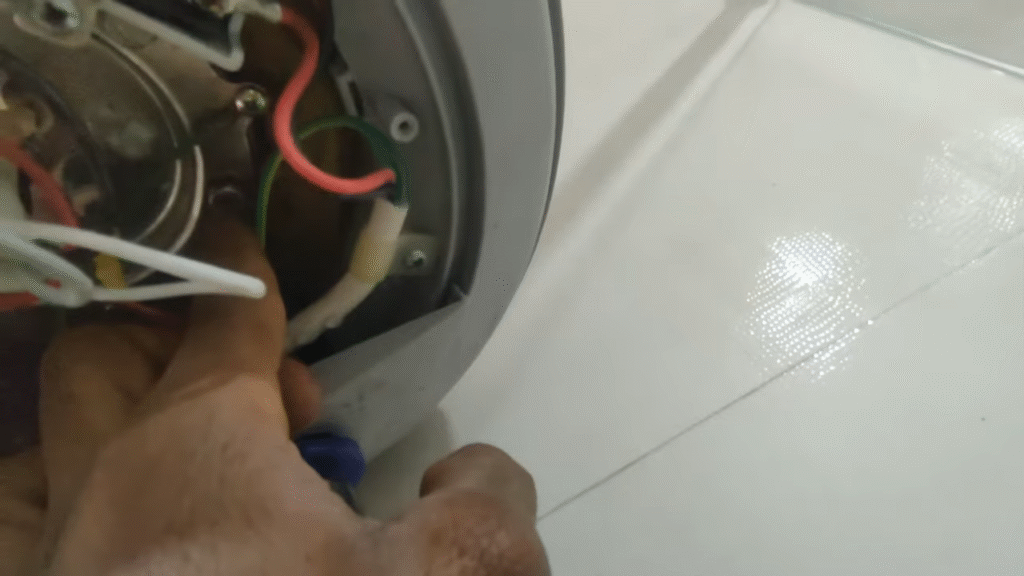
Damaged or Cut Rubber Gasket (Flange Gasket)
What’s happening: The rubber gasket seals the heating element flange to the tank. Heat cycles harden it. Mineral deposits from hard water eat away at it. After years of expansion and contraction, it cracks or tears, and water seeps through.
Your fix:
- Turn off power and drain the geyser completely
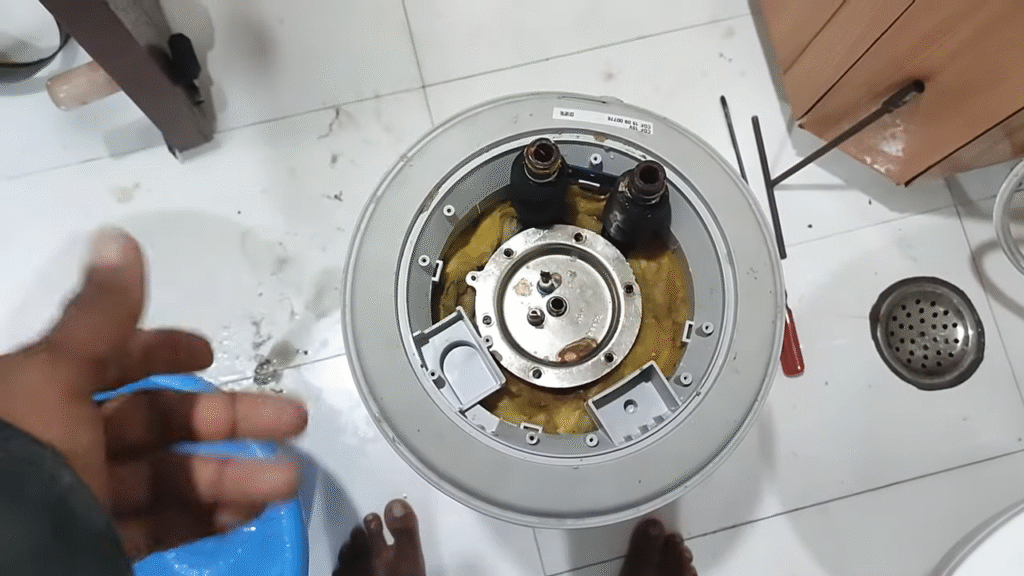
- Unscrew the flange bolts (usually 6-7 bolts) holding the heating element assembly
- Remove the old gasket carefully
- Buy a replacement gasket matching your geyser model (inexpensive, widely available)
- Install the new gasket, then tighten bolts in a cross pattern for even pressure
- Refill and test for leaks
Why this works: This is one of the most economical repairs. You’re not replacing the entire assembly, just the worn seal. Most homeowners can handle this with basic tools.
Important: Tighten bolts evenly. Uneven pressure can damage the new gasket or cause future leaks.
Suggested Reads:
Safety Tips for Using Instant & Storage Geysers At Home
Common geyser problems and their solutions
Geyser Making Noise? Here Are The Solutions
Faulty MFV / NRV (Multi-Function or Non-Return Valve)
What’s happening: The Multi-Function Valve (MFV) prevents excessive pressure buildup and acts as a non-return valve to stop hot water from flowing back into the cold water supply. Over time, salt deposits and scaling clog the valve, preventing it from functioning properly. A faulty MFV results in continuous dripping.
Your fix:
- Locate the MFV on your geyser’s inlet pipe
- Lift the drain lever upward to clean salt deposits and remove blockages
- Perform this maintenance regularly to ensure the valve operates freely
- If water continues dripping after cleaning, the MFV needs replacement
- Contact an authorized service technician to replace the faulty valve with a new one
- Ensure proper hose connections are installed (use Nylon/Stainless Steel braided hoses with minimum pressure rating as specified in your manual)
When to replace: If dripping persists after cleaning attempts, replacement is necessary. This is a job for professionals.
Critical safety warning: Never disconnect, tamper with, or block the MFV. According to all manuals, removing or blocking this valve can result in property damage, serious injury, or death. It’s designed to protect your system and your home.
High Inlet Water Pressure (a big reason for leaks)
What’s happening: Most geysers are rated for maximum 0.8 MPa (80 meter water head). In high-rise buildings or areas with naturally high water pressure, excess pressure stresses all internal components and forces water out through weak joints.
Your fix:
- Install a pressure-reducing valve (PRV) before the geyser inlet
- Ensure minimum water supply height is at least 1-1.5 meters from the geyser (check your manual for exact specifications)
- If pressure exceeds rated limits, the PRV automatically reduces it to safe levels
- Have a technician verify your system meets manufacturer guidelines for your specific model
Why this matters: High pressure is relentless. It attacks every seal, gasket, and joint until something gives. Installing a PRV isn’t optional in high-rise buildings—it’s essential protection.
Corrosion or Rust Inside the Tank
What’s happening: Hard water minerals corrode the inner tank over time. The sacrificial anode rod protects it, but once worn out (typically 1-2 years in hard-water areas), rust takes over and creates tiny cracks that leak.
Your fix:
- Replace the anode rod every 1-2 years, or sooner in hard-water regions
- If you notice rusty or brown-colored water, the anode is likely spent
- If the tank is cracked or severely corroded, replacement is the only option (tanks cannot be repaired)
- Choose geysers with stainless steel or glass-lined tanks for better durability
When to replace the geyser: If internal corrosion has created visible cracks, your geyser has reached end-of-life and needs replacement.
Thermostat or T&P Valve Causing Overflow
What’s happening: A faulty thermostat fails to cut off heating at the correct temperature. Water overheats, pressure builds dangerously, and the T&P valve releases water as a safety response. Continuous overflow signals serious problems.
Your fix:
- If the thermostat has tripped (red indicator glowing), press the reset button carefully
- If resetting doesn’t work, the thermostat needs replacement by an authorized technician
- Never ignore a faulty T&P valve—it means dangerous pressure or temperature conditions exist
- Replace malfunctioning temperature control systems immediately
Critical warning: Operating a geyser with a faulty thermostat or thermal cut-out is hazardous. Manuals explicitly warn against this. Contact a professional technician for diagnosis and repair.
Leakage from Improper Installation
What’s happening: Wrong hose types, inadequate Teflon sealing, poor joint preparation, or installing the geyser where water splashes all cause leaks. Installation mistakes compound over time.
Your fix:
- Use only Nylon or Stainless Steel braided hoses (minimum 8 Bar pressure rating for hot water applications)
- Wrap Teflon tape around all threaded connections before assembly
- Maintain proper spacing: 6 inches from walls, 3 feet from electrical outlets, minimum 1.8 meters from floor
- Never install where direct sunlight, rain, or water splashes reach the geyser
- Ensure wall can support at least twice the geyser’s filled weight
Installation matters: Poor installation creates problems that surface months later. Follow your brand’s specific guidelines exactly.
Sediment & Limescale Build-Up Leading to Leakage
What’s happening: Hard water deposits accumulate inside the tank and around the heating element. These mineral crusts trap heat and pressure, forcing water to escape through weak points. Buildup also blocks proper valve operation.
Your fix:
- Flush and drain your geyser annually to remove sediment and mineral deposits
- In hard-water areas, drain more frequently (every 6 months)
- Install a water softener or pre-filter to reduce mineral content at the source
- Consider descaling products specifically designed for water heaters
- Replace the anode rod regularly to prevent corrosion-related pressure issues
Prevention works best: Regular maintenance prevents most sediment-related leaks. Don’t wait until leaks appear—service annually.
When You MUST Switch Off Your Geyser Immediately
Some leaks are annoying. Others are dangerous. Here are the red flags that demand immediate action.
Critical Warning Signs
1. Water Pooling at the Bottom + Rusty Water Coming Out
This combination signals internal tank failure or severe corrosion. The tank is compromised and can crack further or burst under pressure. Turn off power and water supply immediately. Do not delay—this requires geyser replacement.
2. Continuous Leaking from the T&P (Temperature & Pressure) Valve
The T&P valve only releases water when temperature or pressure reaches dangerous levels. Continuous leaking means your geyser is overheating or building hazardous internal pressure. This can lead to tank rupture. Switch off power and water, then call a technician urgently.
3. Electrical Smell, Sparking, or ELCB/MCB Tripping Repeatedly
Burning smells, visible sparks, or circuit breakers tripping indicate electrical faults inside the geyser. Water is reaching live electrical components—electrocution risk is real. Disconnect power immediately and do not touch the unit. Contact a qualified electrician or authorized service center before attempting any repairs.
4. Water Inside the Electrical Panel or Control Box
If water has entered the electrical housing, there’s immediate risk of shock or fire. Disconnect power at the main switch and keep everyone away from the geyser until a professional inspects it.
5. Steam or Loud Hissing from the Tank
These sounds indicate pressure or temperature is out of control. Steam escaping means water has reached boiling point, dangerous condition. Turn off power immediately.
Bottom line: When in doubt, switch it off and call a professional. Your safety is worth more than any DIY attempt.
Suggested Reads: How to properly install a geyser?
DIY Fixes You Can Try Safely (Only If You’re Comfortable)
Sometimes the smallest tweaks can stop minor leaks and save you a stressful day. Try these quick, low-risk checks before calling a technician:
- Tighten accessible pipe joints
- Loose joints are a common culprit. Use gentle pressure to tighten.
- Manuals consistently advise ensuring all couplings are leak-proof and not over-tightened .
- Loose joints are a common culprit. Use gentle pressure to tighten.
- Clean MFV salt deposits
- The MFV often drips because of thermal expansion, but salt deposits can worsen it.
- Lift the MFV’s drain lever to clear mineral buildup (recommended by Havells & Symphony) .
- The MFV often drips because of thermal expansion, but salt deposits can worsen it.
- Check inlet water pressure
- High pressure can force water out of joints or the MFV.
- Manuals warn not to exceed 0.8 MPa and recommend pressure-reducing valves in high-rise homes .
- High pressure can force water out of joints or the MFV.
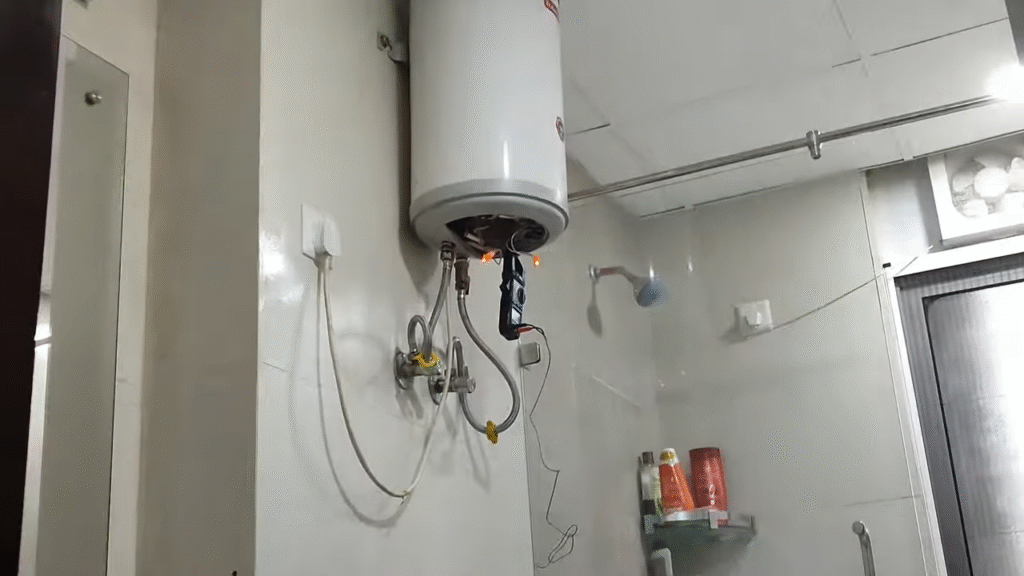
- Reset the thermostat
- Most geysers have a reset button inside the lower panel. A simple press often restores normal heating or stops overflow-related leakage issues caused by overheating.
- AO Smith and Havells specify thermostat locations under the service cover .
- Most geysers have a reset button inside the lower panel. A simple press often restores normal heating or stops overflow-related leakage issues caused by overheating.
- Replace worn washers at pipe joints
- If the leak is at the inlet or outlet fitting, a hardened washer is usually the cause.
- Replacing it is inexpensive and commonly recommended during servicing.
- If the leak is at the inlet or outlet fitting, a hardened washer is usually the cause.
Suggested Reads: Instant geysers vs storage geyser: which one shoud you use?
Important Warnings
- Never open the geyser base if you’re not trained — manuals clearly state servicing should be done by authorized technicians.
- Never operate the geyser without water — this is an explicit warning across brands and can damage the heating element or void warranty .
When You Should Call a Professional Technician
Some problems need expert hands, no second guessing. Call a technician if you notice:
Concord Services technicians handle all repairs as per manufacturer guidelines, keeping your safety and warranty fully protected. Manuals clearly state many parts must only be serviced by authorized experts.
Preventive Tips to Avoid Future Geyser Leakage
A few small habits can save you from sudden leaks and expensive repairs later. Here’s what most brand manuals recommend:
- Keep the inlet valve open always
Prevents vacuum issues and protects tank health (advised by Bajaj & Symphony). - Inspect flexible hoses once a year
Look for cracks, rusted ends, or stiffness. - Descale the tank every 6–12 months
Hard water deposits lead to pressure build-up and gasket wear. - Operate the MFV lever regularly
This removes salt deposits and ensures the valve isn’t blocked. - Replace the anode rod when worn
AO Smith and others highlight its role in preventing internal corrosion. - Check proper earthing and electrical isolation
Reduces the risk of electrical leaks and protects internal components. - Install a PRV in high-rise buildings
High pressure can damage valves, joints, and the tank.
Avoid installing the geyser in direct sunlight or splash zones
Manuals from Havells & AO Smith clearly warn that exposure shortens the life of the heater.
If your geyser is leaking or showing early warning signs, don’t wait for it to turn into a bigger mess. A quick check today can save you money, stress, and unexpected breakdowns later. And if you need a hand, the experts at Concord Services are always ready to help you get everything back to normal, safely and quickly.