How To Clean Geyser Tank at Home Easily ? Step-by-Step Guide
Dirty geyser, slow heating or bad smell? Clean your geyser tank at home with easy DIY steps ✓ Safe, fast, and effective cleaning for better hot water.

Why Cleaning Your Geyser Matters?
You’ve probably noticed it. Your geyser takes forever to heat water, makes weird popping sounds, or the water pressure feels weaker than before. Sometimes the water even smells odd. Here’s the thing: most of these problems aren’t serious breakdowns. They’re usually just sediment and mineral build-up inside your tank.
Regular cleaning fixes this. It improves heating speed, saves electricity, prevents leaks, and helps your geyser last years longer. Most maintenance you can do yourself at home. But for deep cleaning or tricky issues, Concord Services is here to help with expert care.
Step By Step Checklist To Clean Geyser
Not Confident To Repair Your Geyser?
Contact Us For Same Day Doorstep Repair
₹0 Advance Charges
How Often Should You Clean Your Geyser?
Most experts recommend cleaning your geyser every 6 to 12 months. If you live in an area with hard water (high TDS or mineral content), you’ll need to clean it more often, maybe every 3 to 6 months.
Signs your geyser needs cleaning right now:
Don’t wait for a breakdown. Regular flushing prevents these issues, saves energy, and extends your geyser’s life.
Suggested Read: Geyser is Not Heating Water – Common Problems and Solutions
Safety First: Important Precautions Before Cleaning
Before you start cleaning, follow these critical safety steps to protect yourself and your geyser:
Switch off the geyser’s power supply and let it cool completely
Turn off the circuit breaker or unplug the unit, then wait at least one hour for the water to cool down. Hot water can cause serious burns.
Shut off the inlet water valve
Close the cold water supply valve to prevent fresh water from entering the tank while you’re draining and cleaning it.
Open a hot water tap to release pressure
This allows air to enter the system and helps the water drain faster by breaking the vacuum inside the tank.
Wear gloves and safety goggles during cleaning
Protect your hands from hot surfaces and your eyes from splashing water or cleaning solutions like vinegar.
Never switch on the geyser without water inside the tank
Running the geyser dry will burn out the heating element permanently. Always refill the tank completely before restoring power.
Ensure proper earthing and avoid electrical moisture exposure
Check that all electrical connections are dry and properly insulated. Moisture near live wires can cause electric shock or short circuits.
Suggested Read: Safety tips for using Instant & Storage Geysers at Home
Tools & Materials You’ll Need
Step-by-Step Guide: How To Drain Your Geyser Tank
Draining is the first and most important step in proper geyser cleaning. Here’s how to do it safely:
Turn Off Power & Water Supply
Switch off the MCB or unplug the geyser from the power socket. This ensures no electricity flows to the unit while you’re working on it.
Turn off the cold water inlet valve completely. This stops fresh water from entering the tank during the draining process.
Open a Hot Water Tap
Open any hot water tap in your bathroom or kitchen. This breaks the vacuum inside the tank and allows air to enter, which speeds up the draining process significantly.
Access the Drain Point
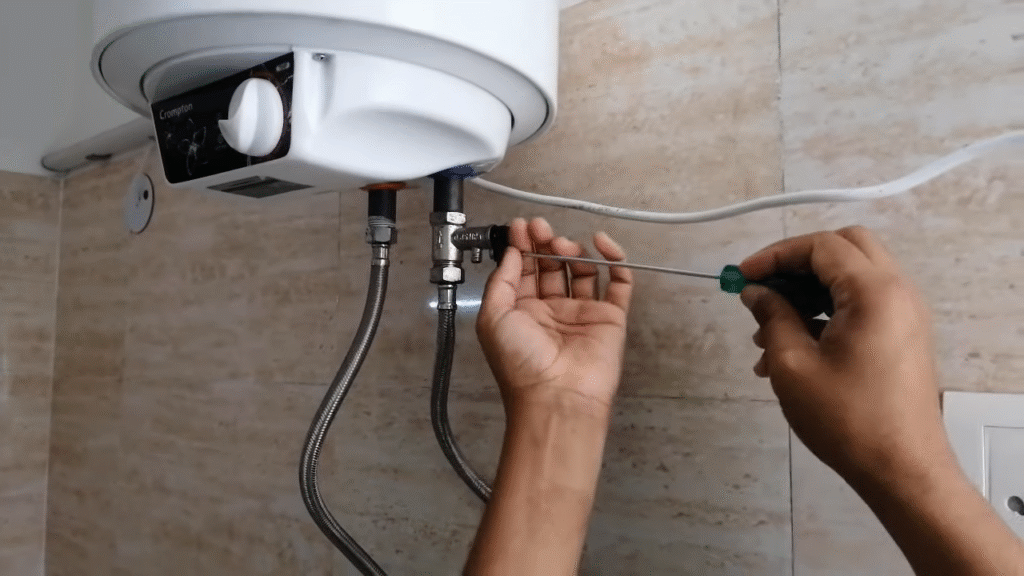
Remove the lower inspection cover if your model has one. Use a screwdriver to carefully open the panel and access the internal drain valve or nut.
Connect a garden hose to the drain valve, or loosen the drain nut (usually 11 mm). Direct the hose into a bucket, floor drain, or outside so the water flows away safely.
Let the Tank Drain Completely

Open the safety valve or MFV (Multi-Function Valve) lever to admit air. This helps the water flush out faster by eliminating the air lock inside the tank.
Watch the drained water for sediment, rust, white flakes, or scale deposits. The color and debris tell you how badly your tank needed cleaning. Let it drain for 10 to 30 minutes until all water is out.
Deep Cleaning the Geyser Tank (Inside Cleaning Method)
For a thorough clean, you’ll need to open the tank and manually remove buildup. Here’s how:
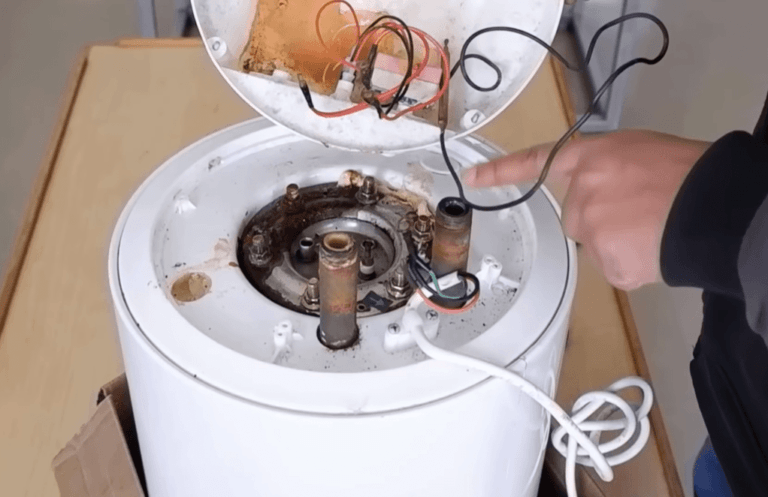
Open the Heating Element Assembly
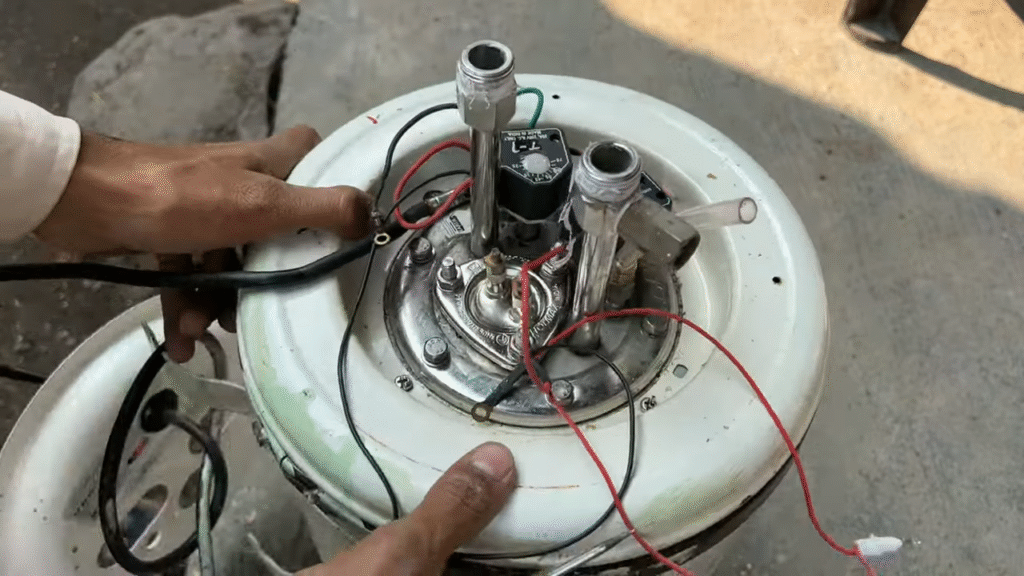
Disconnect all wires carefully (take a photo first for easy reassembly). Label or photograph the thermostat, thermal cutout, and heating element connections before disconnecting anything.
Remove the flange bolts (usually 4 to 6 bolts) and gently pull out the heating element assembly. Use a wrench or screwdriver depending on your model, and be careful not to damage the element or its seals.
Inspect the rubber gasket on the flange; replace it if cracked, worn, or damaged. A bad gasket is the most common cause of water leakage from the bottom of the geyser after reassembly.
Clean Sediment & Limescale
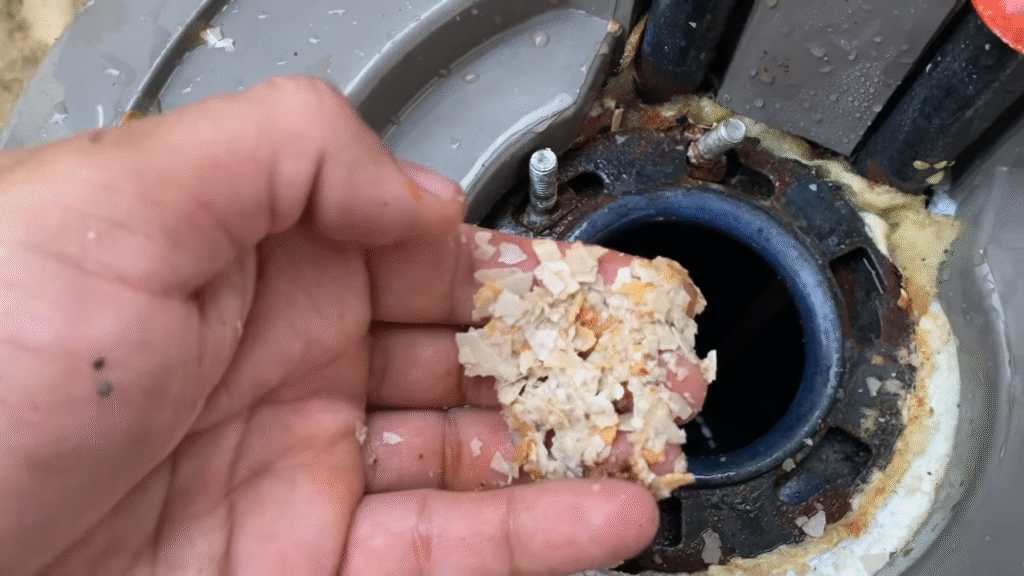
Use a soft brush or sponge to scrub away sediment, rust, and mineral deposits inside the tank. Avoid using harsh abrasives or metal scrapers that could damage the inner glass lining or enamel coating.
For heavy scaling on the heating element:
- Soak the element in white vinegar or a descaling solution for 1 to 2 hours.
- Gently scrub with a soft brush to remove stubborn lime deposits without damaging the coil.
Clean the MFV / Safety Valve

Lift the discharge lever on the Multi-Function Valve (MFV) to clear out salt and mineral deposits. Flushing the valve regularly prevents blockages and ensures it works properly during pressure buildup.
Operating the MFV every few months keeps it functional and prolongs its lifespan. A blocked safety valve can cause dangerous pressure buildup inside the tank.
Suggested Read: Geyser Tripping Circuit Breaker or MCB
Descaling Method Using Vinegar (Without Opening the Tank)
Reassemble and Refill the Geyser
After cleaning, carefully reassemble everything:
Common Issues Cleaning Helps Solve
Regular geyser cleaning fixes these frustrating problems:
Smelly or “Rotten Egg” Hot Water
This odor comes from hydrogen sulfide gas produced when bacteria react with sediment and the anode rod inside the tank. Stagnant water and low temperatures encourage bacterial growth, especially if the geyser hasn’t been used for a while.
Flushing the tank and treating it with white vinegar or hydrogen peroxide kills bacteria and eliminates the smell. You can also increase the water temperature above 60°C temporarily to discourage bacterial growth.
Suggested Read: Geyser Smelly Water Problems & Solutions Guide
Geyser Making Noise
Crackling, popping, or rumbling sounds happen when sediment and limescale buildup around the heating element break down during heating. As water heats, steam bubbles form under the sediment layer and burst, creating the noise.
Draining and descaling the tank removes these deposits, stops the noise, and restores heating efficiency. Clean geysers heat faster and use less electricity because the element isn’t insulated by scale.
Low Hot Water Pressure
Reduced hot water flow is often caused by clogged inlet/outlet filters, sediment blocking the outlet pipe, or a blocked MFV (Multi-Function Valve). Even the strainer mesh inside cartridge-based systems like Symphony PUROPOD can get clogged with debris.
Cleaning the filters, flushing sediment from the tank, and clearing the MFV restores normal water pressure in most cases. If the issue persists after cleaning, check for kinked pipes or faulty valves.
Preventive Maintenance Tips for Longer Geyser Life
Keep your geyser running smoothly for years with these simple maintenance habits:
When to Call a Professional Instead of DIY?
Some geyser problems are beyond basic home maintenance. Call a professional technician if you notice:
Cleaning your geyser once a year is simple and saves you from expensive repairs down the road. Most maintenance you can safely do yourself at home. But for complex issues like leaks, electrical faults, or component replacement, it’s always smarter to call a professional.
Need expert help? Concord Services is here for thorough geyser cleaning, repairs, and maintenance. Book your service today and keep your geyser running perfectly for years.