Geyser Not Heating Water? 8 Common Causes & Quick Fixes
Is your geyser not heating water? Learn the 8 most common causes, from faulty heating elements to thermostat issues, and practical solutions to fix them fast.

Picture this: It’s a chilly winter morning in Kolkata, and you’re looking forward to a warm, refreshing shower before heading to work. You turn on the tap with anticipation, but instead of comforting hot water, you’re met with an icy stream. Your geyser’s indicator light is glowing steadily, there’s no visible leak, and everything looks perfectly normal. So why isn’t the water heating?
You’re not alone. A geyser that refuses to heat water is one of the most common complaints we hear at Concord Services. The frustrating part? The unit often appears to be working fine on the outside, making it hard to pinpoint what’s gone wrong inside.
Here’s the thing: most heating failures have identifiable causes and practical solutions. Whether it’s a faulty heating element, a tripped thermal cutout, or something as simple as a loose wire connection, we’ll walk you through the most common reasons your geyser stopped heating and exactly how to fix them.
Some issues you can troubleshoot yourself with basic checks. Others need the steady hand of an experienced technician.
By the end of this guide, you’ll know the difference and feel confident taking the next step to get your hot water flowing again.
TL;DR
Quick Diagnosis: Is Your Geyser Really Not Heating?
Before we dive into troubleshooting, let’s confirm what’s actually happening. Sometimes what looks like a heating failure is just a matter of timing or a simple setting. Run through this quick checklist:
If everything checks out but water still isn’t heating, let’s dig deeper.
Facing Geyser Problems? Call Our Geyser Technicians
₹0 Advance Charges
Reason #1: Faulty or Burnt Heating Element
The heating element is the heart of your geyser. It’s the component that actually does the job of warming your water. When it fails, your entire system stops working, no matter how perfect everything else looks.
Why this happens most often:
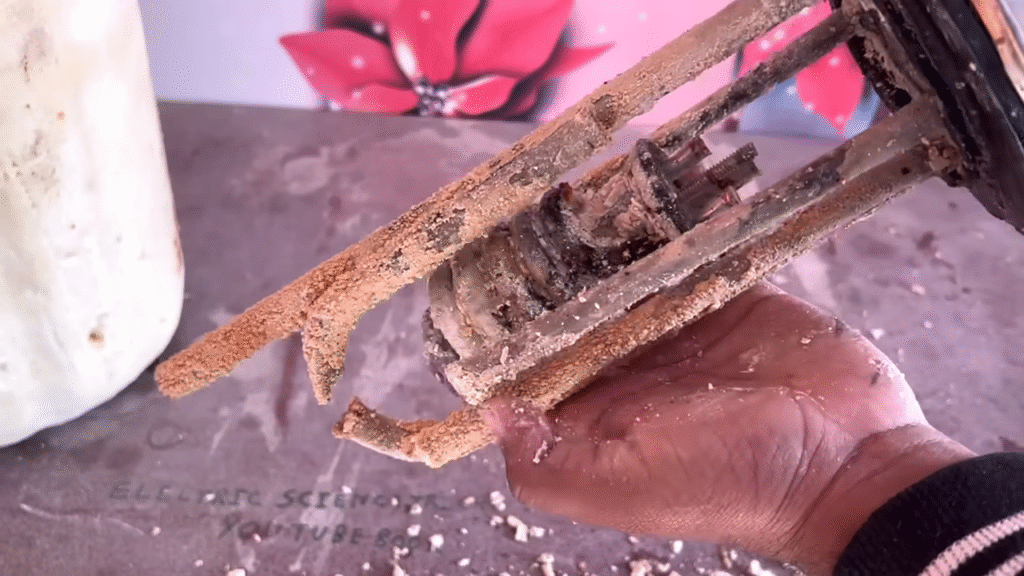
The heating element faces constant stress. Here’s what actually happens inside: scale and mineral deposits build up on its surface, especially in hard water areas. Over time, this buildup acts like an insulator, forcing the element to work harder. Eventually, it burns out. Other culprits include corrosion, dry heating (running the geyser without water), or simply age and wear.
Symptoms you’ll notice:
Power light is ON, heating indicator glows, but the water stays cold. When tested with an ammeter, the element shows zero current flow. Even after waiting 30-40 minutes, there’s no warmth at all.
How to diagnose:
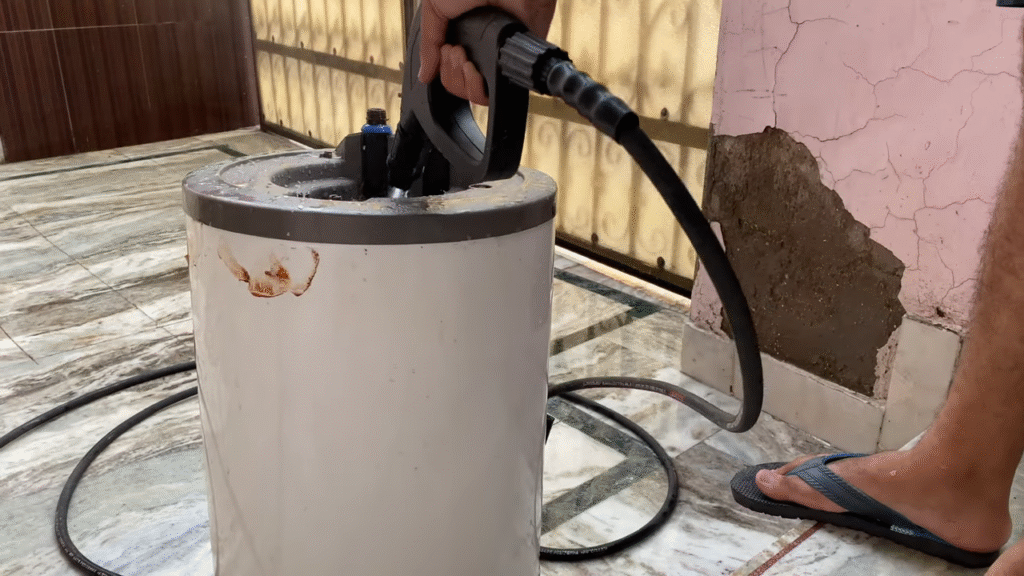
Open the bottom cover of your geyser (disconnect power first). Use an ammeter to check if current is flowing to the heating element. Zero amps means the element has failed. You might also see visible burn marks or heavy white/brown scaling on the element surface.
Solutions:
For mineral buildup, descaling works. Remove the element, soak it in a vinegar solution, and gently scrape away deposits. Clean the contact points thoroughly, this is crucial for proper connection. However, if the element is truly burnt or damaged, complete replacement is necessary. Professional technicians use genuine parts that come with warranty protection. Brands like AO Smith and Havells offer durable Incoloy or glass-coated elements that resist scaling better than standard options.
Prevention:
In hard water areas, descale annually. Never operate your geyser with an empty tank. Schedule regular maintenance checks to catch issues early.
If you are not confident to repair it by yourself, contact us now! We, Concord Services are one of the few famous geyser service center in Kolkata.
Reason #2: Thermostat Problems
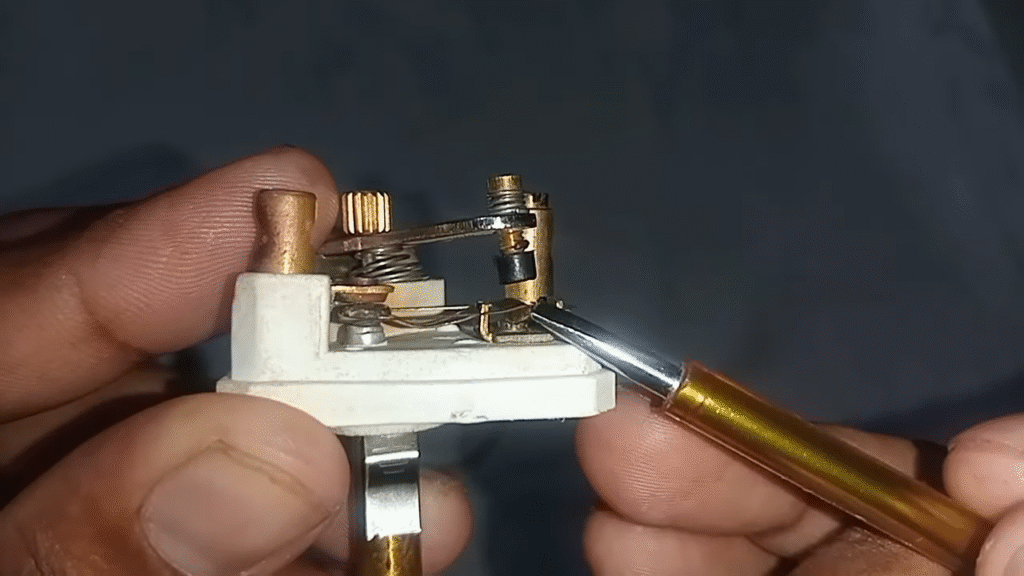
Your thermostat is the brain of your heating system. It’s a temperature-sensing device that controls when your heating element turns on and off. Think of it as a guard that ensures your water reaches the right temperature and stops heating when it does.
Symptoms:
Water heats inconsistently. Sometimes it reaches the desired temperature, sometimes it doesn’t. The heating stops too early, or the green indicator light doesn’t glow as it should. You’re waiting longer than usual for hot water to arrive.
Common thermostat issues:
The temperature setting might be too low. Loose connections can prevent the thermostat from working properly. Carbon buildup on contact points disrupts communication between the thermostat and heating element. In older units, the plastic housing can warp from repeated heating cycles, causing malfunction.
How to diagnose:
Disconnect power and open the bottom cover. Use a tester to check if power is reaching the thermostat at both connection points. If power only reaches one point, the thermostat is faulty. Look for visible carbon deposits, burn marks, or warped plastic housing.
Solutions:
Start simple: adjust your temperature setting to the recommended range of 55-60°C and wait 15-20 minutes. If that doesn’t work, clean carbon buildup from contact points and tighten any loose wire connections. If the contacts are severely damaged or the plastic is warped, replacement is necessary.
Important notes from manuals:
Some geysers come with fixed thermostats preset at 75°C that can’t be adjusted. Modern digital and smart geysers use electronic temperature sensors instead of mechanical thermostats. Never tamper with or attempt to modify pre-set safety thermostats—they’re calibrated for your safety.
When to call a professional:
Thermostat replacement involves electrical work and requires matching specific specifications like shape, rod length, and temperature range. It’s worth having an experienced technician handle this to ensure proper geyser installation and maintain your warranty coverage.
Suggested Read:
Safety Tips for Using Instant & Storage Geysers At Home
Geyser Power or Light Not Working? Step By Step Troubleshoot
Reason #3: Burnt or Loose Internal Wiring
Wires carry the electrical current that powers your heating element. When connections are loose or wires get damaged, electricity can’t flow properly, and your geyser won’t heat.
Why this happens:
High current flow generates intense heat. Poor quality connectors can’t handle it. Moisture that seeps into the unit causes corrosion. Loose connections create arcing (electrical sparks), which burns the wire insulation over time.
Symptoms:
Power light works but water won’t heat. You smell burning coming from the geyser. The MCB trips occasionally. You might see visible burn marks or blackened areas near wire connections.
Diagnosis:
Disconnect power completely. Open the bottom cover and inspect wiring connected to the heating element. Look for carbonized, melted, or short-circuited wires. Check connector clips for burn marks or discoloration.
Solutions:
Cut away burnt wire sections and replace them with new ones. Use heat-resistant connectors and clips designed for high-current applications. Clean contact points thoroughly with a file if needed. Ensure every connection is tight and secure. If the wire is extensively damaged throughout, replace the entire wire rather than patching it.
Safety emphasis:
Always disconnect power before opening the unit. Never reuse loose or burnt connectors—they’ll fail again. Use proper gauge wiring that matches your geyser’s power rating. Tight connections prevent future heating failures and electrical hazards.
Real-world tip from manuals: Clean the heating element attachment points thoroughly before reconnecting any wires. This ensures good electrical contact and reliable heating.
Reason #4: Thermal Cutout Has Tripped
Your thermal cutout is a critical safety device. It’s a non-self-resetting switch that cuts power to your geyser when water temperature reaches dangerous levels, typically 90-105°C. Think of it as an emergency brake for overheating.
Why it trips:
The thermostat failed and didn’t stop heating as it should. You operated the geyser with an empty tank (dry heating). Something malfunctioned internally, causing excessive temperature rise. Scale buildup on the heating element caused abnormal temperature spikes.
Symptoms:
Your geyser suddenly stops heating. The red indicator might glow, or you see an error code like E2 or E25 on digital displays. Everything seems fine, but no water is heating.
How to identify:
Look for a reset button on your geyser. Some models have it externally visible, others inside the bottom cover. Consult your manual to locate it. Some digital geysers show specific error codes when thermal cutout trips.
Solution:
First, ensure your tank is completely filled with water. Then press the reset button. The geyser should restart. However, investigate why it tripped. Did your thermostat fail? Check if dry heating occurred. If trips keep happening, professional diagnosis is essential—repeated resets mask a deeper problem that needs fixing.
Warning: Don’t repeatedly reset without addressing the root cause. This is a safety device protecting you from dangerous overheating.
Reason #5: Low Voltage or Power Supply Issues
This is especially common in areas where electricity supply fluctuates. Your geyser needs consistent, adequate voltage to heat water effectively. When voltage drops, the heating element works with reduced power, and your water heats slowly or not at all.
Symptoms:
Water takes an extremely long time to heat. Heating feels weak or insufficient. Sometimes it works fine, other times it doesn’t. Indicator lights appear dim or flicker. The geyser works well in the evening but poorly during peak hours.
Causes:
Low voltage from the main supply (below 180V). Loose MCB connection at your electrical panel. Faulty wall socket with poor contact. Inadequate wiring gauge for your geyser’s power rating (typically 2-3kW units need thicker wires). Shared electrical circuit with heavy appliances like refrigerators or air conditioners.
Diagnosis:
Check voltage at your outlet using a multimeter. Inspect your MCB for loose connections. Test the socket for proper contact. Verify your geyser is on a dedicated circuit, not shared with other appliances.
Solutions:
For persistent low voltage, install a voltage stabilizer. Tighten or replace loose MCB connections. Replace faulty sockets with proper 16A rated ones. Upgrade to adequate gauge wiring if needed. Ensure proper earthing throughout your installation.
Prevention:
Use a dedicated electrical circuit with an appropriately rated MCB. This prevents voltage drops and protects your geyser from power-related damage.
Reason #6: Sediment and Scale Buildup
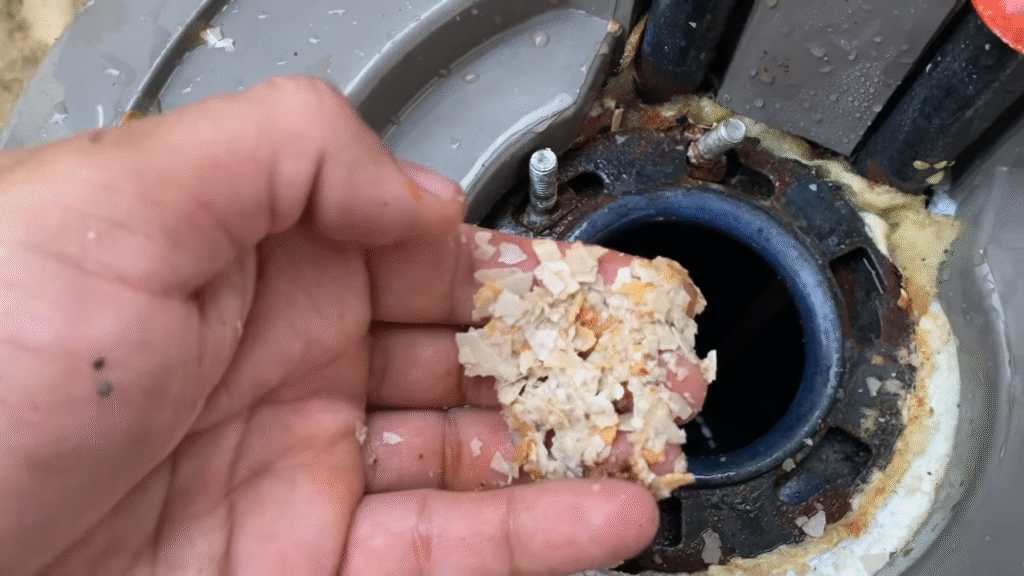
This is especially common in hard water areas. Minerals in your water, calcium, magnesium, and other deposits, accumulate inside your geyser over time, creating a crusty layer on critical components.
How buildup affects heating:
Scale acts like an insulator between the heating element and water. Heat can’t transfer efficiently, so the element works harder but delivers less warmth. The buildup also affects your temperature sensor accuracy, preventing it from reading actual water temperature correctly. Eventually, the heating element burns out from overexertion. Your electricity bills climb while heating performance drops.
Symptoms:
Water heats very slowly, much longer than it used to. Even after waiting 40 minutes, water is only lukewarm. You hear strange popping or rumbling noises. Your heating time has increased noticeably over recent months.
Where buildup occurs:
On the heating element surface, at the tank bottom, around the temperature sensor pocket, and inside pipes and connections.
Solutions:
Annual tank flushing removes loose sediment. For element descaling, remove it carefully, soak in a vinegar solution, and gently scrape away deposits using a soft tool. Clean thoroughly before reinstalling. Manufacturers approve specific descaling agents for deeper cleaning. For long-term relief, install a water softener at your inlet.
Prevention:
Hard water areas need professional descaling every 6 months. Consider a water softener or conditioner. Drain your tank if unused for extended periods. Modern geysers like Symphony offer Puropod filter cartridges that help reduce scaling. Brands recommend descaling frequency based on your water hardness level.
Reason #7: Dry Heating / Empty Tank
Dry heating means operating your geyser without water inside the tank. This is one of the most damaging things that can happen to your unit and must be avoided at all costs.
Why it’s dangerous:
Without water to absorb the heat, the heating element temperature skyrockets instantly. It can burn out completely in minutes. The extreme heat can damage the tank’s inner coating. In severe cases, there’s a fire risk. Your thermal cutout will trip, but by then the damage is often done.
How it happens:
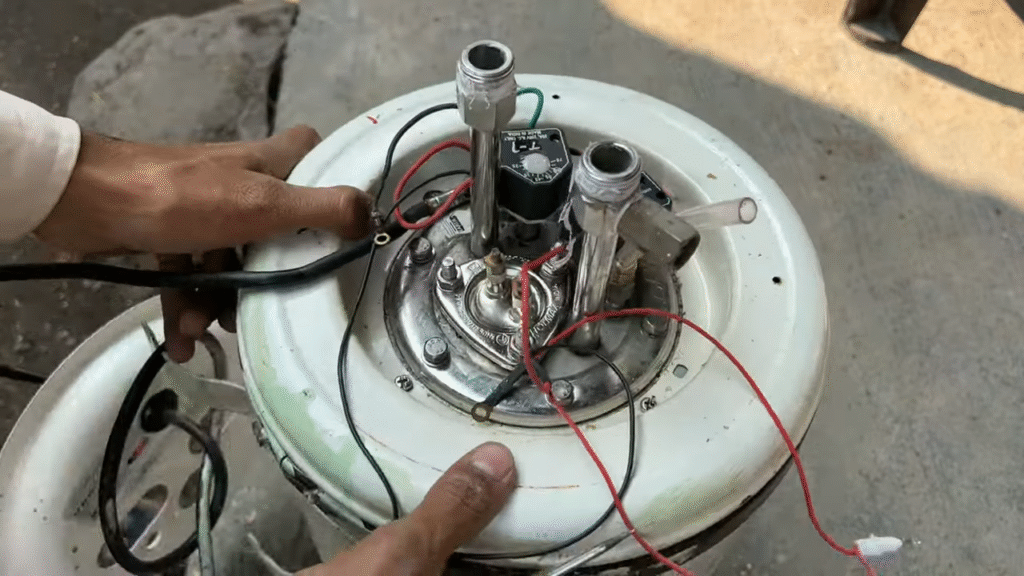
You forget to fill the tank before switching ON. Water supply suddenly stops during use. A faulty multi-function valve allows water to drain back through the inlet. The outlet gets blocked, preventing the tank from filling while it’s heating.
Symptoms after dry heating:
Burnt smell from the geyser. Error codes like E2 or E25 appear on digital displays. The heating element becomes completely non-functional. Thermal cutout trips and won’t reset easily.
Solution:
Immediately switch OFF power and let the unit cool completely. Only then fill the tank fully with water. Try pressing the thermal cutout reset button. If the heating element is damaged, replacement is necessary. Investigate what caused the empty tank and fix it.
Prevention:
Always ensure your tank is completely filled before switching ON power. Check that water flows from the outlet before powering the unit. Install and maintain a proper multi-function valve. Perform regular MFV maintenance to ensure it functions correctly and doesn’t allow backflow.
Suggested Read: Geyser Smelly Water Problems & Solutions Guide
Safety Devices That Can Stop Heating
Here’s something important to understand: sometimes your geyser stops heating precisely because safety devices are doing their job. These aren’t geyser problems—they’re protections that are actually working.
Thermal Cutout:
This device cuts power when water temperature reaches 90-105°C. It’s non-self-resetting, meaning it requires manual intervention or professional service to restart. When it trips, it’s telling you something went wrong—either your thermostat failed or dry heating occurred.
ELCB (Earth Leakage Circuit Breaker):
Built into modern geysers or installed separately, this device cuts power if it detects current leakage (10-30mA sensitivity). It prevents dangerous electrical shocks but stops heating immediately when triggered. A tripped ELCB indicates an electrical fault that needs investigation.
Thermostat:
Controls your temperature range and can stop heating if it’s faulty or set incorrectly. A non-functioning thermostat can’t communicate when to stop heating, triggering other safety devices.
Why they matter:
These devices prevent dangerous overheating accidents, protect you from electrical hazards, and extend your geyser’s lifespan.
Critical warning from all manuals: Never tamper with, bypass, or modify any safety device. It’s dangerous and voids your warranty. These protections exist because your safety matters.
Step-by-Step Troubleshooting Guide
Follow this sequence to identify exactly what’s wrong with your geyser’s heating. Work through each step methodically before moving to the next.
Step 1: Verify the basics
Is your power supply actually ON? Check if the indicator light is glowing. Is water filled in the tank? Open a hot water tap to confirm flow. How long have you waited? Remember: instant geysers need 10-15 minutes, storage geysers need 20-40 minutes. Many “heating failures” are simply timing issues.
Step 2: Check temperature setting
Look at your thermostat. Is it set to the recommended range of 55-60°C? If it’s set too low, adjust it upward. Wait 15-20 minutes and check if water heats. Sometimes the answer is this simple.
Step 3: Test power supply
Check your MCB (circuit breaker) status. Is it in the ON position? Use a multimeter to test voltage at your wall outlet. Proper earthing is essential—check if the socket has three pins or if earthing is connected properly.
Step 4: Listen and observe
Look at the digital display for error codes like E2, E25, or E01. Listen carefully—do you hear popping, hissing, or burning sounds? Is your MCB tripping repeatedly? These observations matter.
Step 5: Check thermal cutout
Look for a reset button on your geyser—it might be on the external cover or inside the bottom panel. If you find it and the thermal cutout has tripped, press it gently and restart the geyser.
Step 6: Basic visual inspection (power OFF first)
Disconnect power completely. Open the bottom cover carefully. Look for obvious burn marks on wires or connections. Check if wire connections are tight. Smell for any burnt components.
Step 7: Decide: DIY or professional help
Simple issues like temperature adjustment, pressing a reset button, or checking MCB status are safe DIY tasks. Complex issues like testing the heating element with an ammeter, repairing internal wiring, or replacing components require professional expertise. When in doubt, call a technician.
When to DIY vs. Call a Professional
You can safely try yourself:
Checking and resetting your MCB. Adjusting thermostat temperature settings. Pressing the thermal cutout reset button. Verifying water supply and tank fill level. Tightening visible loose connections (with power OFF). Basic cleaning of accessible parts.
Call a professional for:
Heating element replacement or testing with an ammeter. Thermostat replacement. Internal wiring repairs. Persistent electrical faults. Tank descaling and deep cleaning. Error code diagnosis. Any issue requiring extensive opening of the unit. If you’re unsure or uncomfortable with electrical work.
Why professional service matters:
Safety is paramount. Electricity and scalding water are dangerous combinations. Professional technicians have the training to work safely. They use genuine spare parts that come with warranty protection.
Proper diagnosis prevents the same issue from recurring. Brand-specific knowledge ensures correct troubleshooting—an AO Smith geyser operates differently from a Bajaj or Havells model.
DIY repairs might void your warranty, but professional service maintains your coverage. Technicians have specialized tools for accurate testing and diagnosis.
What Concord Services offers:
Our experienced technicians service all major brands. We use only genuine parts. Our pricing is transparent with no hidden charges. We deliver quick turnaround on repairs. We stand behind our work with proper warranty coverage.