How to Install an Electric Geyser at Home Safely? Step-by-Step Guide
Simple DIY electric geyser installation guide. Learn tools needed, step-by-step setup, and safety measures for home installation.

TL;DR: Quick Summary
Installation Time: 1-2 hours
Difficulty Level: Moderate (professional help recommended)
Key Tools: Drilling machine, spanners, Teflon tape, metal pipes, bucket
Main Steps: Mount bracket → Hang geyser → Connect pipes with Teflon tape → Install Multi-Function Valve → Wire connections → Fill tank → Test leaks → Power on
⚠️ Safety Tip: Never turn on an empty geyser. Always fill the tank first, use MCB with proper earthing, and install the pressure relief valve.
Pre-Installation Preparation
A. Choose the Right Spot
Pick a strong wall that can support your geyser’s weight. Place it near your water pipes to reduce heat loss. Install it at least 6 feet above the floor for better water flow and pressure. Leave some breathing room around the unit for easy servicing later.
B. Check Power Requirements
Your geyser needs a dedicated 15A socket with proper earthing. Don’t risk using extension cords or cheap wiring. A Miniature Circuit Breaker (MCB) is your best friend here. It protects against power surges and keeps your family safe from electrical accidents.
C. Tools & Materials Required for Installation
| Category | Items Needed | Purpose |
|---|---|---|
| Tools | Drilling machine with concrete drill bit | For mounting brackets on wall |
| Pipe wrenches (set of spanners) | Tightening water pipe connections | |
| Spirit level | Ensuring geyser is mounted straight | |
| Measuring tape | Marking installation height and spacing | |
| Screwdriver set | Electrical connections and fittings | |
| Plumbing Materials | Metal flexible pipes (2 nos.) | Connecting inlet and outlet water lines |
| Teflon tape | Sealing threaded connections, preventing leaks | |
| Multi-function valve (MFV) | Safety valve with non-return function | |
| Pipe fittings and adapters | Matching pipe sizes to geyser connections | |
| Electrical Materials | Heat-resistant electrical wire | Safe power connections |
| 15A socket with earthing | Dedicated power supply | |
| MCB (Miniature Circuit Breaker) | Protection against electrical surges | |
| Safety Equipment | Safety gloves | Hand protection during installation |
| Safety goggles | Eye protection while drilling | |
| Bucket | Draining water during setup or maintenance | |
| Mounting Hardware | Heavy-duty bolts and washers | Securely fixing geyser to wall |
| Wall mounting brackets | Supporting geyser weight (usually included) | |
| Cement concrete (for hollow walls) | Reinforcing mounting area if needed |
D. Turn Off Main Power & Water Supply
Safety first. Switch off the circuit breaker before you start. Turn off the main cold water valve too. This prevents electrical shocks and unwanted leaks while you work. Never skip this step, even if you’re just checking connections. Your safety isn’t negotiable.
Hire Concord Service’s Geyser Technician
For Same Day Installation & Repair
₹0 Advance Charges.
Step-by-Step Electric Geyser Installation Process
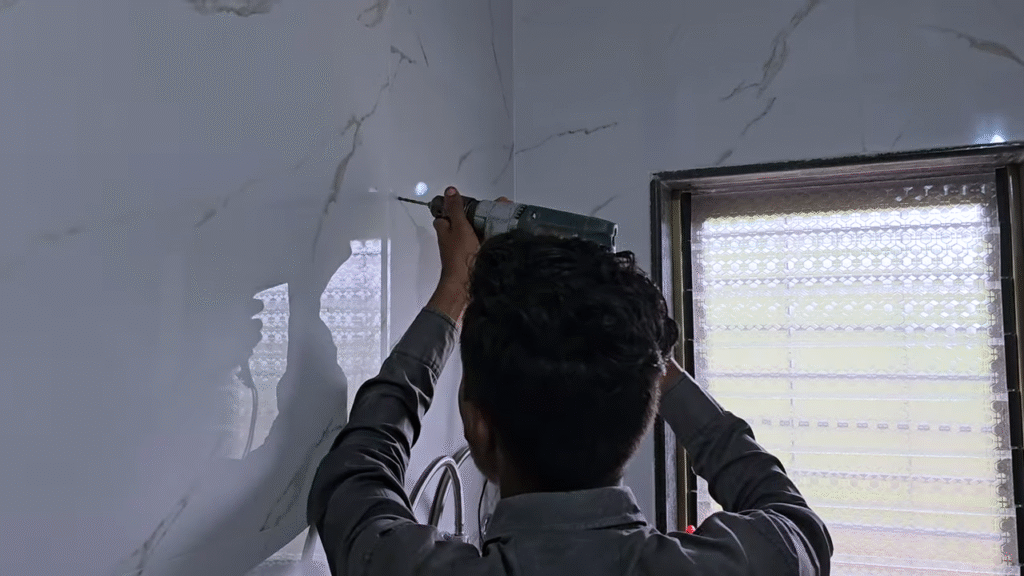
Step 1: Mark and Drill Wall Holes
Start by marking the wall where your geyser will hang. Use the mounting bracket as your guide to get the spacing right.
Drill holes using a concrete drill bit, making sure they’re level and aligned. For hollow brick walls, dig deeper and fill with cement concrete for extra strength.
Let it cure properly before moving forward.
Step 2: Fix Mounting Bracket
Now secure the mounting bracket with the heavy-duty bolts and washers provided with your unit. Make sure it’s firmly attached to the wall.
The bracket needs to handle the full weight of your geyser plus water. Double-check that it’s level.
A wobbly bracket means trouble later, so take your time here.
If you are not confident to repair it by yourself, contact us now! We, Concord Services are one of the few famous geyser service center in Kolkata.
Step 3: Hang the Geyser
Carefully lift the geyser and align it with the mounted bracket. It should sit securely without any movement. Check the stability by gently pushing it.
Leave at least 50mm clearance from the ceiling, 500mm from sides, and ensure it’s minimum 1.8 meters from the ground for optimal water pressure and easy servicing access.
Suggested Read: Instant Geyser vs Electric Geyser : Differences & Facts
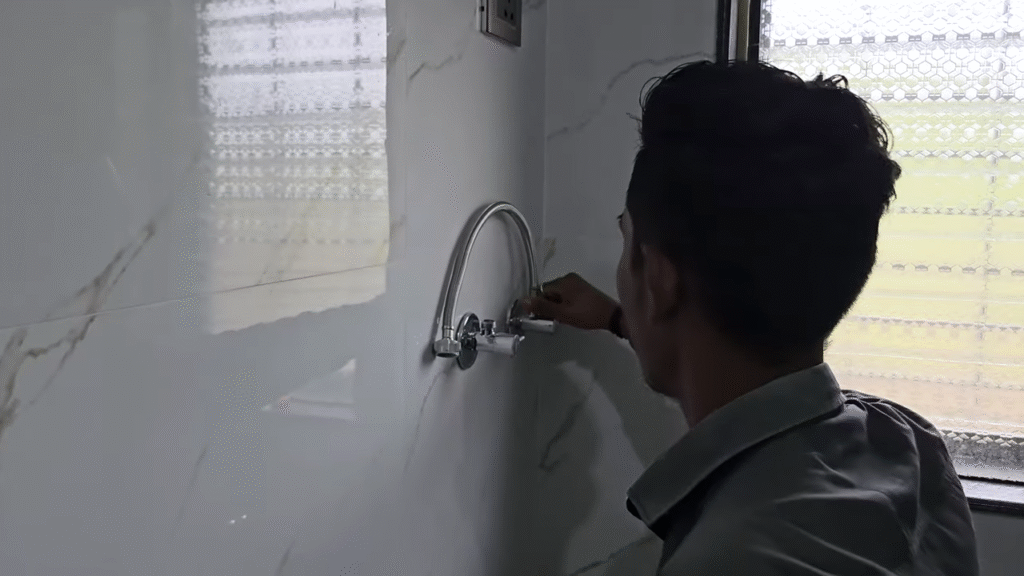
Step 4: Connect Inlet & Outlet Pipes
Connect your metal flexible pipes to the inlet and outlet points. Blue marking indicates cold water inlet, red shows hot water outlet.
Wrap Teflon tape around all threaded connections before tightening. This prevents leaks and ensures warranty validity.
Use spanners to secure the connections firmly but don’t overtighten and damage the threads.
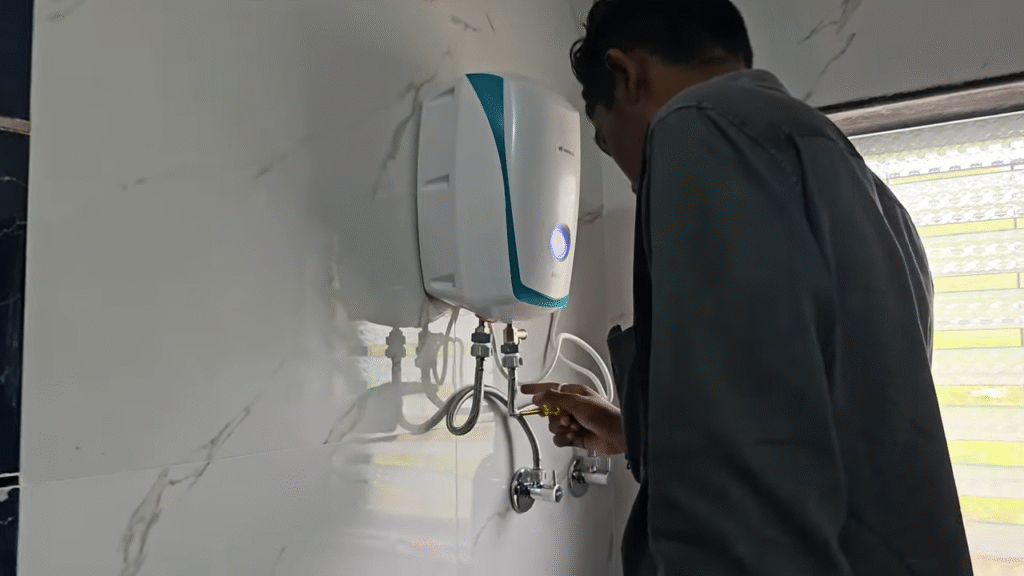
Step 5: Connect Pressure Relief Valve (If included)
The Multi-Function Valve is critical for safety. It prevents excessive pressure buildup, acts as a non-return valve to stop backflow, and allows hot water expansion during heating.
Install it on the cold water line as per the manual.
Missing this valve can void your warranty and create dangerous pressure situations inside the tank.
Step 6: Electrical Wiring Connection
Follow the wiring diagram carefully. Connect Live (Brown), Neutral (Blue), and Earth (Yellow/Green) wires correctly. Use a dedicated 15A MCB instead of regular switches.
Keep the power switch at a safe height, away from wet areas and children’s reach. Never compromise on quality wiring.
If you’re unsure, call a qualified electrician immediately.
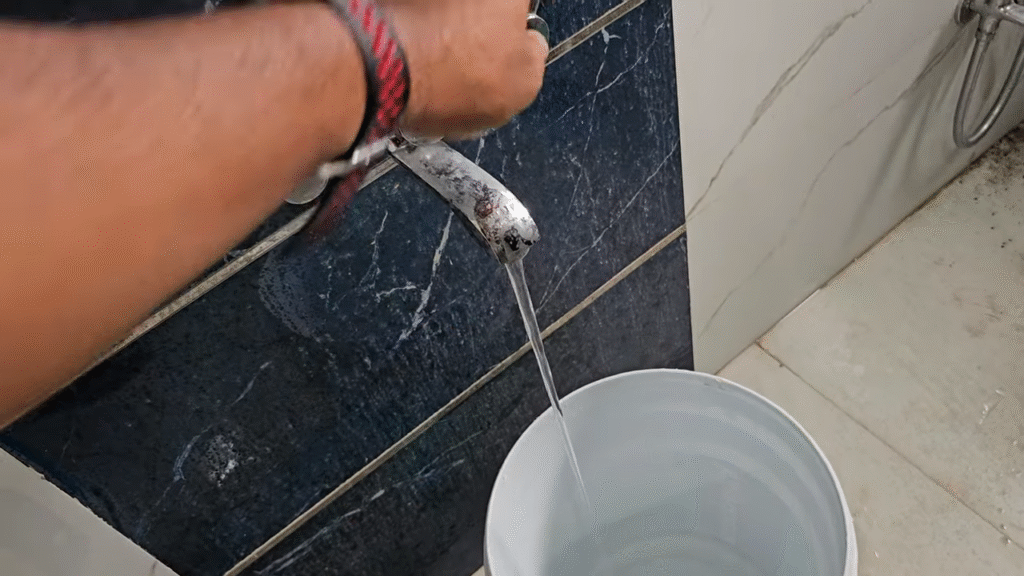
Step 7: Fill Water & Test for Leaks
Turn on the main cold water supply. Open the hot water tap to let air escape while the tank fills. You’ll hear water flowing when the tank is full.
Check all pipe joints, valve connections, and fittings carefully for any water leakage.
Tighten connections if needed. Never power on the geyser with an empty tank.
Suggested Read: Safety Tips For Using Instant & Storage Geysers At Home
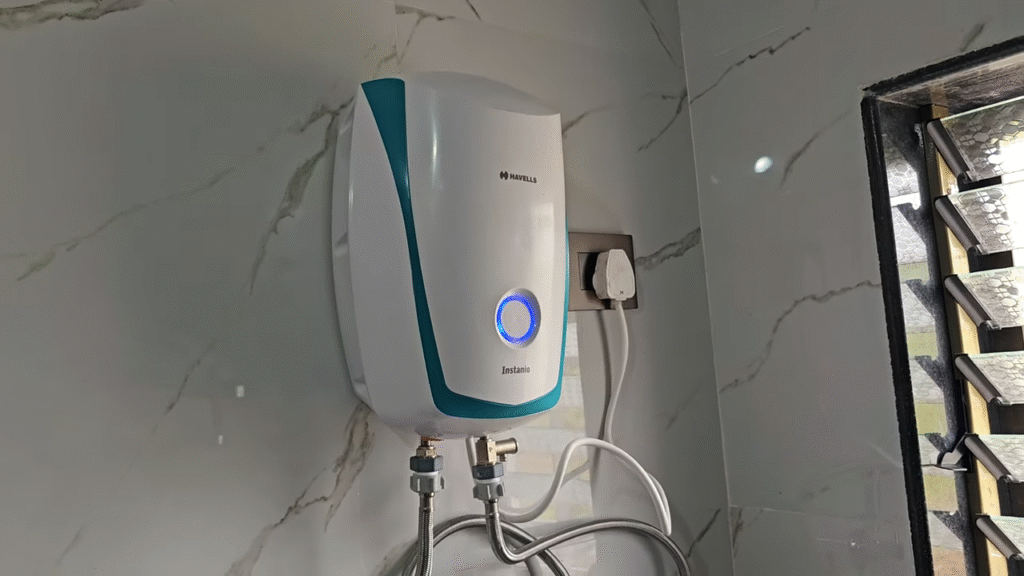
Step 8: Power ON and Test Heating
Once the tank is completely full, switch on the power. The LED indicator will glow blue, showing water is heating.
After 10-15 minutes, the LED turns amber when it reaches the preset 75°C temperature.
Test the hot water flow from your tap. Your geyser is now ready to use safely and efficiently.
Post-Installation Checks & Safety Tips
Never Operate Without Water Inside
Always ensure the tank is completely full before switching on the power. Running the geyser empty will damage the heating element permanently within minutes. Open the hot water tap and wait until water flows steadily, confirming the tank is filled and ready for safe operation.
Avoid Switching On for Long Hours
Don’t leave your geyser running all morning or throughout the day. Modern heaters warm water in just 10-15 minutes, so switch it on only when needed. Continuous operation reduces the appliance’s lifespan, increases your electricity bills, and puts unnecessary stress on internal components.
Ensure Proper Earthing and MCB Protection
A dedicated MCB (Miniature Circuit Breaker) is essential for protecting against electrical surges and overloads. Proper earthing prevents electric shocks and makes your geyser safe to use. Never compromise on these safety features as they’re your first line of defense against electrical accidents.
Regularly Inspect Plug & Wire Condition
Check your power plug and electrical connections periodically for signs of wear, burn marks, or loose fittings. Use only high-quality, heat-resistant plugs and sockets designed for water heater loads. Replace damaged wires immediately to prevent short circuits or fire hazards.
Annual Professional Maintenance Recommended
Schedule yearly servicing to flush sediment buildup, inspect the anode rod, and check all safety valves. Professional maintenance catches potential issues early and keeps your warranty valid. In hard water areas, more frequent geyser cleaning prevents mineral deposits from reducing heating efficiency and causing premature tank failure.
Common Mistakes to Avoid
Mounting on Weak Walls
Installing your geyser on hollow bricks or weak plaster walls without proper reinforcement can lead to dangerous collapse.
The combined weight of the unit and water can exceed 20-25 kg, requiring a strong, stable surface. Always reinforce hollow walls with cement concrete or choose a solid wall section that can safely bear the load.
Using Plastic Pipes Instead of Metal Braided Ones
Plastic pipes can’t withstand the high temperatures of hot water and may crack or melt over time, causing leaks and water damage.
Metal flexible pipes are heat-resistant, durable, and specifically designed for water heaters. Using plastic pipes also voids your warranty and creates serious safety risks in your home.
Suggested Read: How to Uninstall Geyser – Step By Step Guide
Not Checking Earthing
Skipping proper earthing is one of the most dangerous installation mistakes that can cause fatal electric shocks. Water conducts electricity, making earthing absolutely critical for safe geyser operation.
Always verify that the earth wire is properly connected and the MCB is functioning before you power on the unit.
Skipping Pressure Valve Installation
The Multi-Function Valve prevents dangerous pressure buildup inside the tank that could cause explosions or leaks.
It also acts as a non-return valve to prevent dry heating when water supply stops.
Installing without this valve not only voids your warranty but puts your family’s safety at serious risk.
Maintenance Checklist (Printable / Downloadable)
Download Our Geyser Installation Checklist In case You Prefer DIY